by
by 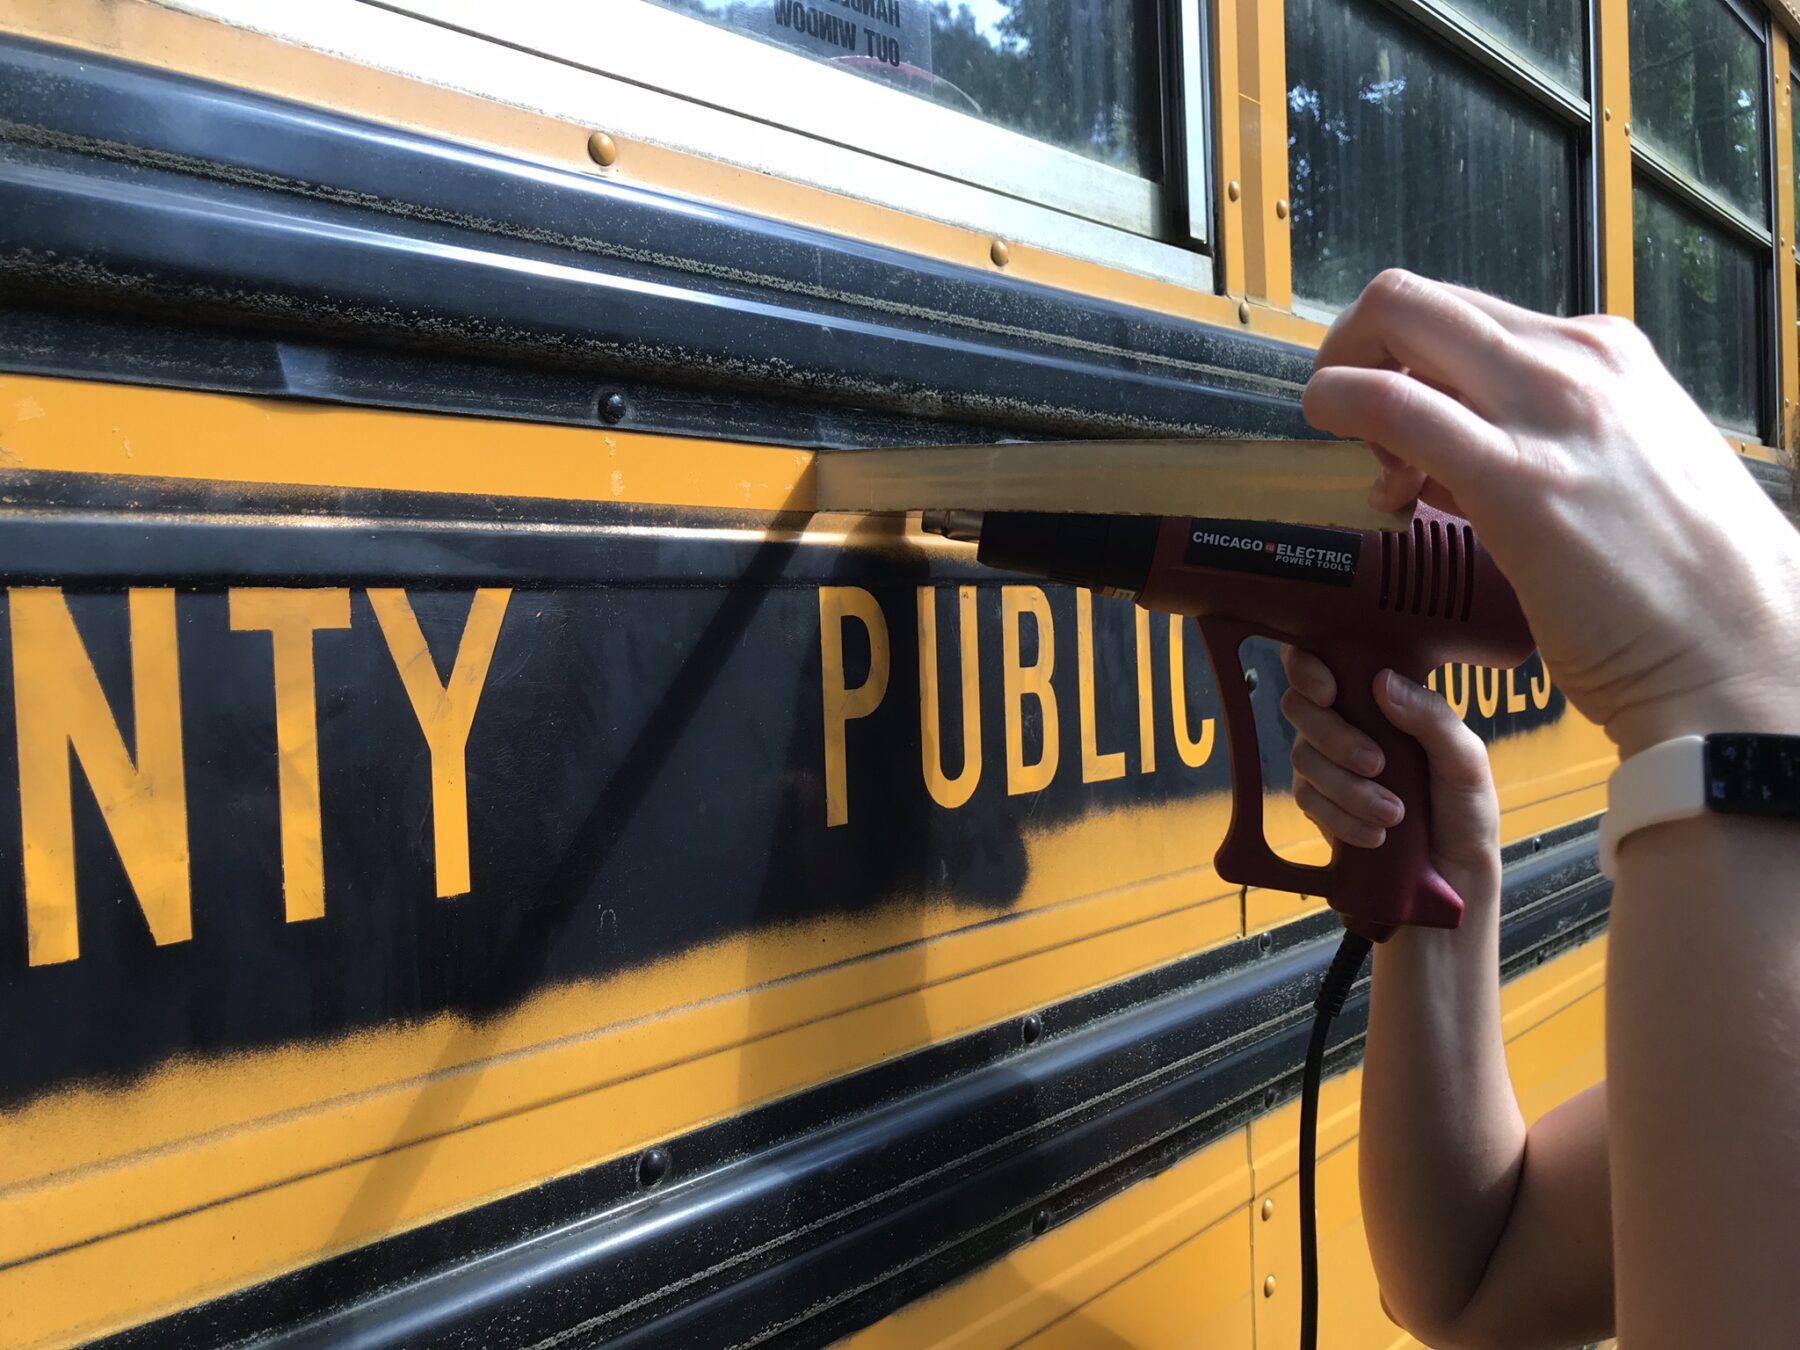
Once we got the bus into the back yard, we realized you could see it from the street. Not a huge problem, but we’re not trying to draw too much attention to ourselves. That, and we’re renting our house and our landlord lives down the street. The last thing we want is for him to take issue with what we were using the yard for. We figure the best way to do that would be to make it less of an eyesore and a little less noticeable. (And pay our rent as early in the month as possible.)
Looking back on our Skoolie Workshop experience at the United Tiny Home Festival, we saw a number of examples of how to paint a school bus. Some people had full professional looking sprays and others had just used a roller to paint over the existing paint. We jumped for the cheaper option and paint it ourselves by hand.
It was a simple process with only a few steps, but those steps were pretty long and tedious at times. At the end of they day it is just a massive surface area to cover. I’ll quickly review the steps we took to paint our bus below.
- Prep the bus for paint
- Sand/scuff all surface areas
- Mask anything you are not planning to paint or remove
- Clean all surfaces you intend to paint
- Paint
- Paint again
- Paint a third time
There are really only two steps, but that first one is a doozy…
Prep the bus for paint
Prepping the bus for paint is not difficult, but it can be extremely tiring. The main idea is to give the new paint something it can easily stick to. The easiest way to do that is by scuffing/sanding the existing paint to remove the gloss.
Materials
Sanding the bus surfaces here is definitely straight forward, but there are a few products we found that can make the job quite a bit easier. The basic materials we used are listed below.
Palm Sander
Just about any palm sander will do. This is really just to cover as much surface area as possible in the least amount of time. Chelsea and I each used a Drill Master Orbital Palm Sander from Harbor Freight. This was really the only time we saw ourselves using them and we truly went for the cheapest option. At about $14 a piece we figured they were a deal no matter how long they lasted. I believe towards the end of prepping for paint one of them had dies, but the other is still going!
The side of a bus is generally not completely flat, but this one was just small enough to fit between a lot of the grooves and go the whole length of the bus.
Sand Paper
The palm sander is pretty useless without sand paper and at $14 a pop, they do not come with any. I had picked some up at Harbor Freight, but it seemed like we were going through it like crazy and I was not impressed with the job it was doing. We finally settled on something a little heavier. I was at Home Depot when this purple 3M 120 grit sand paper caught my eye and decided to give it a try. I swore I’d be back for more the second I started using it, but it lasted so long, I never got the opportunity! We used it for everything. We used it by hand and with the palm sander depending on what we needed to do. We still use it for everything else we need to sand. Nothing seems to stick to it either. When it felt like it was getting caked with paint or anything else we’ve used it on since, I slapped it against whatever I was working on and anything sticking to it fell right off, ready for another go. This stuff was a little more expensive than a lot of the other sand paper, but lasted so much longer than anything else we tried.
Sanding Blocks
The sand paper we had chosen was amazing, but it was still exhausting getting around all the individual rivets and under the ribs, but fortunately when I had bought the sand paper, I had seen these foam blocks made by the same brand. I didn’t pick them up right away, but I wished that I had. After a day or two of straining my fingers trying to push the sand paper into the super tight spaces to make sure the paint would stick, I sprung for the 3M 120 Grit Sanding Sponge. It made quick work of all of the hard to reach places and the sponge did the work so my fingers didn’t have to. These did not last nearly as long as the sand paper and they started to lose their shape pretty quickly, so I definitely would not recommend using these exclusively. You’d need about 100. But for the tight spaces, I was glad to have them.
Cleaning the prepped area
Once we had finished sanding, the last thing to do was thoroughly clean and dry the prepped area. This was super easy as all we really needed to do was make sure there was not loose paint left over from sanding before applying paint. We used an old hand towel soaked in water to wipe down the bus. It was sunny and the water left over dried instantly so we could start painting right away.
We definitely did not do this one step at a time. We would focus on one area, and actually start painting before other areas had been prepped at all. It helped split the task up a bit and allowed us to see progress sooner rather than later.